In this tutorial I will explain what every setting in Blender 2.5’s volumetric shader does and how it works.
I am using Blender 2.50 Alpha 1.
In Blender 2.5 there are many new features in the properties window. In the material tab you will find a new set of four buttons. These are four different types of material available in Blender 2.50. Three of these have been around for a couple of years, but the volumetric shader is a new feature in blender 2.50. When you select this option a whole set of new buttons, input boxes, and sliders appear. I list below what each button does and what each slider controls. I also show several images of each different option.
Density Panel
There are two input boxes/sliders.
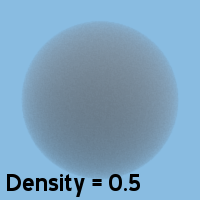
The “Density” box controls the overall density of the shader. Range=0 to 1


The “Density Scale” box controls the scale of the density. Basically it serves as a multiplier for the density value. Range= 0+


Shading Panel
The settings in this panel control the color, shading, emission, and reflection of the material. There are five different groups of settings.
First is the Scattering value. The higher the value the denser the material, works similar to the density value. Range= 0+


The Asymmetry value controls how the object gets shaded. Anything near zero looks like regular shading. Values closer to 1 and -1 appear flatter and slightly darker. Range=-1 to 1


The Transmission color controls the color of the material that is shaded or is receiving scattered light through the material.


The Emission color and value work just like “Emit” value in surface shader materials. Range= 0+


The Reflection color and value work just like the “Diffuse Reflection” color and value in surface shader (solid) materials. Range= 0+


Lighting Panel
The parameters here control the shading and shadows of the material. The Lighting Mode drop down box contains five different lighting methods.
Shadeless, this option renders the material with out shadows or shading. The material still casts shadows.

The Shadowed option works similar to the shadeless option but lets the material receive shadows as well.

The Shaded option renders the material with shading, it will not receive shadows from an outside object (for some reason if another object is inside a object with this material it will cast a shadow) unless the External Shadows option is turned on. The Light Cache option saves the shading to a voxel grid saving render time. This is less accurate but faster. The resolution value controls the resolution of the voxel grid. Higher values are better quality but slower. If the shadows option is enabled the shadows will be unscattered (sharp) as it passes through the material.


Multiple Scattering option renders the material with shading scattered in multiple directions. The shading appears like it has been blurred. There is something very peculiar about the multiple scattering option: it does not receive shadows from outside sources except when you choose the shaded option and click “External Shadows” and then select the Multiple Scattering option from the dropdown menu. The Multiple Scattering option can take significantly longer to render than the other shading options (The images of the volumetric sphere took on average 10 seconds to render, the ones below took about 35 seconds to render.


There are several parameters, the first being Diffusion, this value controls the strength of the “blurring” effect. A lower value will result in less blurring, or sharper shading. A value of 0 results in no scattering. Range=0+


The next parameter is the Spread value. The spread value works similar to the Asymmetry value. Values close to one appear normal while values further from one, .5, 1.6, appear flatter and slightly darker and make the volume appear as if it had been shaded with the Oren/Nayer shader. High Spread values take a very long time to render. Range=0+


The last value is the Intensity value. This controls the intensity of the scattering. A low value near zero results in no light/shadows on the material, while a high value results very bright lighting. It works just like the reflection parameter but only for the scattered light. Range=0+


The Shaded + Multiple Scattering option combines both scattering options together. I am not sure why you would need this when both options have everything that you would need.

Transparency Panel
There are only two options.
Z-Transparent. This option works fine most of the time, but it won’t look right in raytraced reflections.
Raytrace. This option only works on scenes that have raytracing enabled.
Integration Panel
The options here control sampling frequency and cutoff.
The Step Calculation dropdown menu has two options for step calculation: Randomized or Constant. There are also two input boxes.
The Step Calculation dropdown option Randomize causes the step calculation to be random while the Constant option causes the step calculation to be constant. I would not use Constant calculation because it causes banding anytime the step value is higher than .15. You might however, want to use it if you were rendering with a small step calculation, in which case it would be noise free.


The next parameter is the Step Size value. This value controls the size, or distance between, the volume depth samples. A higher value means poorer quality and faster rendering. Higher values will have more banding if you are using Constant Step Calculation or more noise if you are using Random Step Calculation. Range=0+


The Depth Cutoff value controls when the step calculation is stopped. The value controls when the calculation is stopped based on the transmission of the material. When the transmission drops below the cutoff value the calculation is stopped. This speeds up rendering in large, dense volumetric objects, but with less accuracy. Range= 0-1


There are several other articles on Volumetric Shading in Blender 2.50, here are two of them:


